Blog
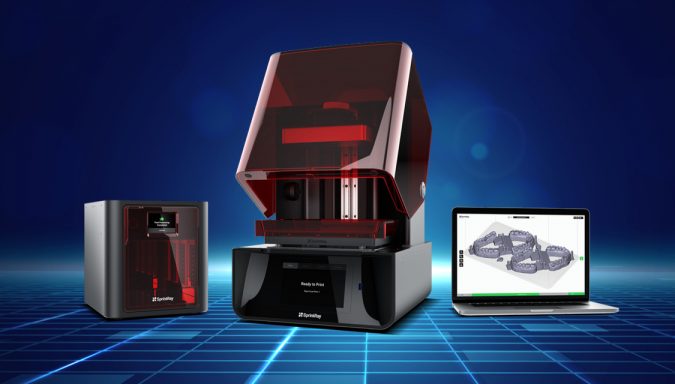
Are you ready to 3D print clear aligners in your practice?
Dr Katyal’s Publications, General, UncategorisedWhen you go digital as an orthodontist, or as a dentist delivering orthodontic treatments, your options don’t end at just getting a scanner. If, like a lot of dental professionals with scanners, you are still taking alginate impressions for models, it may be time to consider the cost and efficiency savings of 3D printing.
In a recent BOSS webinar, I invited Mario Aparicio, Managing Director of APAC Digital Dentistry, and Aparicio Digital Dental Laboratory, to present on the topic of ‘Applying a 3D printer to your Orthodontic Workflow and DIY clear aligners’.
I first approached Mario several years ago to discuss going ‘powderless’ in my orthodontic practice – that is, removing the need to use alginate and stone and the accompanying model grinder.
Since that first time Mario presented at our practice, I have continuously been blown away by his passion for everything to do with dental 3D printing. In my opinion, he is the best source of information on the topic, which is why I was thrilled when he accepted my invitation to present this webinar to our BOSS community.
It starts with the scanner
Mario started off by saying that, when deciding whether a 3D printer is right for your practice, you must first start by looking at your scanner.
Regardless of what scanner you use, the scan needs to be exported as an STL file (the 3D printing format). For this reason, if you are considering 3D printing now, or think you may do so in the future, it is wise to invest in a scanner that’s up to the job. As Mario said, when it comes to this level of technology, whether it be scanning or 3D printing, you get what you pay for, and it doesn’t pay to cut corners by buying cheaper equipment that won’t perform when you need it to.
The printer and the plastics/materials
After the scan comes the preparation of the model using the 3D printer. Mario explained that there are SLA printers that are laser focused, LCD printers and DLP printers. Regardless of the printer used, you put a Class 1 liquid resin into it, which it converts into a solid shape that perfectly replicates the 3D scan you have taken of your patient’s mouth.
Mario discussed the various pros and cons of a number of different plastics/ materials for retainers and aligners. GT Flex and Zendura certainly got his top marks. I absolutely agree that getting the right plastic is crucial when 3D printing to create an aligner of the same high quality that is, for example, produced by Invisalign.
The software
The next topic Mario covered was the very important subject of bridging the gap between scanning and 3D printing – which is essentially concerned with the software.
There are a number of options out there, and Mario expressed his preference for 3Shape which, despite being most expensive, he believes to be the best software for orthodontic flow.
Incidentally, Mario’s rundown of the software options included a fascinating fact that I wasn’t previously aware of: Spark Clear Aligner System (currently only for use by orthodontists, but rumoured to soon be available for general clinicians) immediately releases the first three aligners in their cases, so that if you do have a 3D printer, you could actually print and issue the first three aligners to your client instantly, rather than have the usual 3-5 week wait to get started.
He also referenced the continual improvements in high end software, such as 3Shape, that now intuitively automate certain simple – but previously time-consuming – parts of the process to make our jobs so much simpler.
It was interesting to hear, however, that these softwares, despite being super-smart, do allow you to override certain elements of the process if need be. For example, if it prescribed a course of 11 aligners to reach the desired patient outcome, but you, for whatever professional reason, believed an 8-stage process to be sufficient, you could override it and the software would adjust the treatment series accordingly.
The benefits of 3D printing
Mario then got to the real nuts and bolts of the webinar as he spoke about the actual manufacture of aligners using your own in-house 3D printer. After all, why are you thinking about essentially increasing your workload by bringing this part of the process in-house?
Well, the benefits are considerable, and include:
- Reduced lab costs as you aren’t sending scans away to have aligners made elsewhere;
- Quicker treatments start times, because again you aren’t waiting on an external manufacturer; and
- The convenience of being able to immediately re-print/manufacture any of your client’s aligners if they get lost or damaged – meaning their treatment program is not interrupted while awaiting replacements from a third party.
Mario provided an in-depth breakdown, dollar-for-dollar, comparing the costs of manufacturing each aligner yourself with an in-house 3D printer versus getting them made externally. This had some fascinating numbers that alone make for a very compelling case for bringing the process in-house.
Outsourcing some elements
While Mario made the good point that even if you do invest in a 3D printer and bring the manufacture in-house, there may still be some elements that you prefer to outsource, in order to use your time wisely . You may, for example, opt to outsource cutting and trimming lab work or the design element – tasks which Mario’s company can assist with.
Mario also discussed high-tech advances in cleaning and post-curing for 3D printed models, choosing the right suckdown machine and tools, different options for outsourcing your design element (and the benefit of choosing locally-based service providers) and gave a quick demonstration of the SpringRay RayWare in action, which is truly impressive software. He also let us know about a very convenient and cost-effective turnkey solution that he and his brother offer through their company, which includes many of these elements necessary for adding 3D printing to your practice. As he says, it’s a package that he wished was available when he first started 3D printing. Personally, I have nothing but praise for the support that Mario and APAC offer; it’s fast; efficient and provides real peace of mind.
A growing appetite for 3D printing
I then opened the floor to questions for the rest of the webinar, and Mario answered a range of queries on the issues he had discussed in relation to 3D printing, including software considerations and the various pricing options for different 3D printers and packages.
Wrapping up his presentation, Mario gave us a refreshingly bold confirmation that yes, we are now able to do everything in dentistry with 3D printers.
If you’ve ever considered adding in-house 3D printing to your practice, watch the webinar recording here and I guarantee you’ll gain some interesting new insights!
I concluded the webinar by taking an online poll of attendees, which revealed that 58% of those participating intended to buy a 3D printer in the coming months, which really highlighted the increasing popularity of this remarkable orthodontic tool.








I am general dentist practices at India .I am interested in printing aligners for my patient at my clinic only.
Do you provide software for general dentist also or not
Hi Dr Suchitra we provide training and courses for clear aligner as well as how to use 3D printers to fabricate aligners inoffice. However softwares are provided by industry manufacturers. Thank you.